| ABOUT | PRODUCTS | RESEARCH | BLOG | COMMUNITY |
|
|
Mechanical
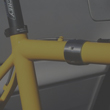
From creaking bottom brackets to wrapping those new bars in cork, a mechanic's job is never done. CREAKING BOTTOM BRACKET
CHAIN-LUBES
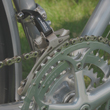
We are impressed with products from NFS and Rock and Roll. The two products represent very different approaches to chain lubrication and as such, each should be used for riding in different conditions. Rock and Roll has developed "dry" lubes to compete for the part of the market that White Lightning pretty much had a lock on for some time. These products are a step up from the past. Now that I have had a chance to road test the stuff, I can report that the products (Rock and Roll Gold and Extreme Dry) lubricate better and last longer than White Lightning. They also hold up to water somewhat better. Neither of them picks up any dirt once dry. They give the chain more of a wet lube feel out on the road than White Lightning does. Finally, neither of them get that wax buildup. Rock and Roll lubes are best used when conditions are good to excellent ... generally as a "race day" lube. I use RnR to lubricate my track chain and my Speedplay cleats. On the other hand, NFS (Nix FrixShun) is the ultimate chain lube for both bad riding conditions and for longevity. It is not a "dry" lube but it does not attract dirt either. Its lubrication properties in rainy and muddy conditions are the best in the business. ROCK AND ROLL NFS (Nix FrixShun) was developed by someone with long experience in mining conveyor systems. The sales of NFS support the development of young frame builders through the Ballers Ride programs. And it is the most effective, longest lasting chain lube ever to hit the market. We are not talking 100+ miles per application. Under ideal conditions, 300 miles is no issue. Full-on rain riding for 120 miles will see NFS still in there and doing its job. It sounds too good to be true, but it really is that good. I use NFS exclusively for both my road and cross bikes. For sales information, click this link. For discussions about use and effectiveness, click this link to VelocipedeSalon's NFS thread. Pay attention to the application recommendations found in the VS thread. You will swear that you are not applying enough with only ten drops. In fact, I have found that ten drops is usually too much. Get on it!
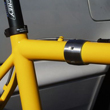
HEADSET ADJUSTMENTS
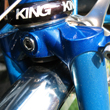
First, keep in mind that if a headset is either a tiny bit loose or a tad tight, you can ruin the races in as short a time as a hundred miles. When I say a "tiny bit," I mean as little as a sixteenth of a turn of a wrench. That is not much, and it is very easy to screw one up. Compounding this problem is that fact than many headsets and some frames and forks tend to "seat in" during their first few hundred miles. During seating in, the headset can come out of adjustment. As with all headsets, the first step must be the preparation of the frame and fork. But let's assume that your frame and fork are prepared perfectly. Installing the headset requires the correct tools: a headset press and a crown race slammer. Don't try it with home made stuff. When pressing in the head tube races, make sure that they are as reasonably tight as possible. This will reduce seating in time. This also holds for the crown race. If you have a King headset, special King tools are absolutely required for installation. You cannot fake it. If you are using a Campy Record or Chorus headset, notice that the two bearing sets are different. The little ones go on top. Grease your bearings well with good stuff. After assembly of the bearings, washers and lock nuts, you will need to assemble the rest of the bike. You cannot properly adjust a headset until everything is assembled. The front brake needs to be installed and adjusted. The handlebar stem must be in place and TIGHT. If it is not fully installed, final tightening will readjust the headset. When you have the bike assembled, straddle the front wheel facing the rear of the bike. Assuming that the front brake is controlled by the left brake lever (now on your right), grip the bar and brake lever with your right hand. Squeeze the lever so that the front brake locks the front wheel. With your left hand, use your index and second finger to feel for the crack between the upper race cone and cup. With your left hand in this position, use it to rock the bike forward and backward against the front brake. If the headset is loose, your fingers will feel a "click" or "clunk" with each rocking motion. If the headset is either correctly adjusted or too tight, you will not feel a click. In the end, you want to get to the point where you are within a few degrees, at most, from getting a click without actually getting one. Now we start adjusting. First you want to get to the point where the upper race and lock nut are snug against each other and there is still a small click. Just take your time either loosening or tightening both the race and lock nut till you are to that point. Once there, you will need to know that holding the upper race stationary while tightening the lock nut will actually tighten the bearing adjustment. At the same time, loosening the upper race against a stationary lock nut will loosen the bearing adjustment. This becomes useful, as we want to end up with the correct adjustment at the same time that the upper race and lock nut are tight against each other. If you feel that you are close to the right adjustment, but a bit loose, just hold the upper race stationary and tighten the lock nut a bit. Check for click. If you have lost the click, loosen the upper race against the lock nut and check again. If you have not lost the click, tighten the lock nut further. Eventually, by incrementally tightening and loosening the upper race and lock nut, you will get to the point where there is almost, but not quite a click, and the race and nut are fully tight against each other. That is the sweet spot. You will want to check adjustment for the first two hundred miles every ride or so to make sure that things are staying in adjustment. Don't be surprised if you have to touch up the adjustment. A few final things, King GripNut headsets do not need very much lock nut pressure. Go easy on them. Dura-Ace and Ultegra headsets, while self-aligning to an extent, are a bit harder to feel click with. Most threaded headsets use aluminum for their wrench flats. It is very easy to bugger them up. Take your time adjusting your headset. A few extra minutes now can save an expensive part of your bike from a premature death. BAR TAPE TRICKS
First, we almost always use Cinelli Cork tape. I like the way it feels and works especially well when the sweat gets bad. I am aware that it does not last very long. I just think that the feel is worth it. This taping method will work fine for any of the padded stretchy tapes out there anyway. Second, I should say that the purpose here is not really to have a tape job that works any better than any other. I just like making them look good. It sucks if you deliver a wonderful new bike with a crappy tape job. The basic concept is to end up with what appears to be one continuous tape wrap that looks as though it goes right through the control levers without wrapping around them. Also, we want to eliminate any of that silly Cinelli electricians' tape for the end of the tape up by the stem. Materials and tools needed: Cinelli Cork bar tape, a straight edge razor or Exacto knife, Super Glue'(the Permatex stuff works well) and 3"X 10" piece of cardboard. Before starting to wrap, peel back your control lever gum hoods. They should remain on the bodies, but you can peel them forward easily from their rear edges. Ergo lever hoods need to be peeled over the release levers as you go. You can hold the bike best if you straddle the front wheel while facing the rear of the bike. This way, you can grip the front wheel with your knees. Start your wrap at the end of either side of the bar making sure that your wrap goes over the top towards the outside of the bar, not the inside. This will assure that once you are finishing up at the stem, the tape will be wrapping over the top away from you as you ride. Do not try to start the wrap exactly at the end of the bar. Start it so that there is at least half of the tape width overhanging the end of the bar. This way you will be able to trim the excess with your razor later for a clean look. The yellow paper strip comes off as you wrap to expose the double sided tape. As you wrap, keep the tape tight enough to prevent any looseness gaps, but not so tight that it tears. Also, as a rule of thumb, you want to overlap the previous wrap by about one third of the width of the tape. Less, and you risk gaps, more, and you risk running out of tape. Watch out around the bends as you will need to tighten up the wrap width to prevent gaps. As you approach the bottom of the control lever, try to time your wraps so that the last wrap just barely hits the bottom of the control lever. If you have to make that last wrap with a bit more overlap, no problem. No one will notice. As your wrap goes past the bottom of the control lever, continue your wrap parallel to the previous one 'till you run into the control lever body. At this point, you want to use the razor to cut the tape at a point so that it can be glued to the bar right at the rear edge of the control lever body. Apply two small drops to the inside surface of the tape end you have just cut. WARNING: DO NOT GET THE GLUE ONTO ANY PART OF YOURSELF! Stretch the tape a bit as you stick it to the bar, locating it so that tape wrap appears even with the previous wraps. You have about two or three seconds to get the location right as SuperGlue sticks really fast once air cannot get to it. Hold the glued end of the tape onto the bar tightly for about ten seconds. That is enough. Your next step is to use that short extra piece of tape supplied with your kit, and trim the ends of it to fit your control lever. This short piece is one of the "tricks" to this tape job. You are using it to apply a tape wrap, which appears to go right through the control lever body. So before you remove the paper backing, hold the short piece in place overlapping a third of the last wrap and parallel to it. You will notice that for clean ends of this piece, you will want to trim their ends diagonally so that once the tape is applied; the ends will be cut vertically along the rear edges of the control lever body. Your top cut of this short piece just needs to be located so that the piece will have a good sticking area on the bar just behind the upper-outer edge of the control lever body. Usually, as this short piece wraps around towards the outside of the bar, about half of its width will pass above the control lever body. You can trip the upper end of this piece so that it ends up having a long "S" shape cut to give it more glue area on the top of the bar. Once you are satisfied with the short piece shape, peel off the paper backing, apply SMALL amounts of glue to the ends and stick the LOWER end to the bar at the inner edge of the control lever. Hold it tight for about ten seconds and then stretch the piece around to the outside while holding the inner end and stick the outer end to the bar as well . Give the short piece a minute or two to set up. Now for the last piece, start above but still overlapping the inside end of the short piece. Again, trim the end (if necessary) so that the first wrap will be parallel to the short piece. Apply glue to the end, stick it in place, wait ten seconds or so and start to wrap. At this point, you should be wrapping over the top AWAY from the rider. Keep wrapping, keeping the warps even so that you won't look like a geek. When you get to the Ferule (Cinelli bars) or bulge (everyone else's), stop. Here is where the final trick comes in. You have already thrown away the end tape, didn't you? OK. The tape will be coming over the top of the bar towards you but somewhat diagonally. With the paper backing still on, place your piece of cardboard behind (under) the tape, supported by the top of the bar. Decide where you want the tape to end when you are all done wrapping. On Cinelli bars, this is usually right at the ferule. With most other bars it will be at the start of the bulge. If you use clip-ons, you will probably need to end further out. Use your razor to carefully cut the tape perpendicular to the bars. This will give you a tape end shaped like a sharp dagger, tapering to a point. The cut itself is usually about 5"-6" long. Peel back the remainder of the paper, apply your glue in that last 5" of tape, right up to the tip. Without gluing yourself to the tape or your bike, finish the wrap so that the tape appears to blend into itself and disappear without any lumps. Pretty Cool. Don't worry; you'll get the hang of it after you do it a couple of times. Now to finish. Pull the control lever covers back in place. With Campy covers you will need to clear the release lever and kind of stretch and wiggle it at the bottom to get it to click into place. Next, take your razor and carefully trim the floppy end of the bar tape where you started at the bar end. You want to cut it so that it is flush with the bar end. If you use Cinelli bars, just stick the end plugs in making sure that the Cinelli logo is upright (not cool otherwise). With most other bars, you need to glue a bit of leftover tape (a 1cm. piece) onto the plug tabs before using the plugs. The inside diameter of those bars is a bit too big for the plugs. DONE - at least for the first side. Now just do the other side. If you get really screwed up doing this, I just hope you had the smarts to try it on your friend's bike first. Then you can do it right on your own bike. HOW TO USE A SILCA IMPERO FRAME PUMP (or most other ones for that matter):
Silca Impero pumps come with four different types of heads. They all work the same, but the sealing grommets are only adjustable on some of them. The sealing grommet is the rubber donut which the tire valve goes through in the pump head. The most common head is a dual finger type made by Silca shaped somewhat like the old Campy steel heads. Although the fingers tend to break pretty easily, the head actually works quite well. This type of head uses a slotted screw at the back end of the head to adjust the seal grommet. The older Silca made heads did not have adjustable grommets. The Campy steel heads were adjusted by tightening the screw-on grommet retaining cover. I say "were" because Campy has not marketed their steel heads for years and the supply has dried up. If you have one or can get one, DO IT! (and give it to me) They were the best. There are a few tricks which one must use while pumping tires with Silca pumps. The most important thing to understand is that presta valves can be bent or broken quite easily and one must take steps to avoid doing so. Get into the habit of pumping your tires up by only holding the pump, NOT by holding the wheel or tire. The easiest way to do this is to pump up the tire with the wheel off the bike. Work the pump head onto the valve stem by moving the pump shaft back and forth while pressing the head onto the valve. At all times, the head must be aligned with the valve. If there is any pressure still in the tire, you must prevent the pump handle from being forced out of the end of the pump by the tire pressure. To do so, hold the handle and pump shaft tightly together in one hand and, make sure that the head is perfectly aligned with the valve as you press the head onto the valve. Once the head is well seated on the valve, grasp the head and pump end by wrapping your index finger around the end of the head and holding the shaft tightly with the rest of your hand. Lift the wheel off the ground with the pump, keeping the head and valve at 12:00 o'clock. Always keep the head and valve aligned with each other so that the valve has no bending pressure on it. Start pumping up your tire. Be sure to not pull the handle too far back. You can pull it right out of the shaft if you try. Once the tire pressure begins to climb, you will find it more difficult to pump. To get that last atmosphere or so in, you will want to use leverage to your advantage. For the easy part of the pumping, most people will have had the pump shaft running from side to side around waist level. When the pumping gets more difficult, you will want to end each stroke with the pump shaft almost perpendicular from your waist with the head end away from your belly. That way, you can pull the head end of the pump straight in while holding the handle end in at your belly. Thus, while the pumping is the most difficult, you will have the most leverage. This may sound awkward, but once you get the rhythm, it is very efficient and quick. With a bit of practice, you will be able to easily reach 7 atmospheres (about 100 lbs.) quite quickly. Once you have pumped up your tire, the last trick is removing the pump without harming either the pump or tire valve. Place the wheel back on the ground with the valve still at 12:00 o'clock. Hold the pump handle in one hand and strike straight down on the pump shaft with your fist as close to the head as possible. It should pop right off. Things to remember:
|


|

